Inktober 2020 collection
My collection of drawings for inktober 2020. Wasn't going to participate at first, but then I decided to participate late, on day 2 already. So I didn't have an actual theme, so I just did characters from games that I like and that's it. I tried to challenge myself by changing styles, doing things I'm not very confortable with and trying new things. Oh and of course, trying to do something way too big for my skills at the final days and losing sleep in the process, that's so me lol. Some drawings I can't show the process or sketches because I really didn't plan ahead so I didn't keep some of them safe on a sepparated layer. It was a blast as always and a great bit of learning. Thanks to anyone who reads this and I hope you enjoy o/

Day 1 - Master Owl - Sekiro. I've made this and the next one over game screenshots.

Day 2 - Isshin Ashina - Sekiro
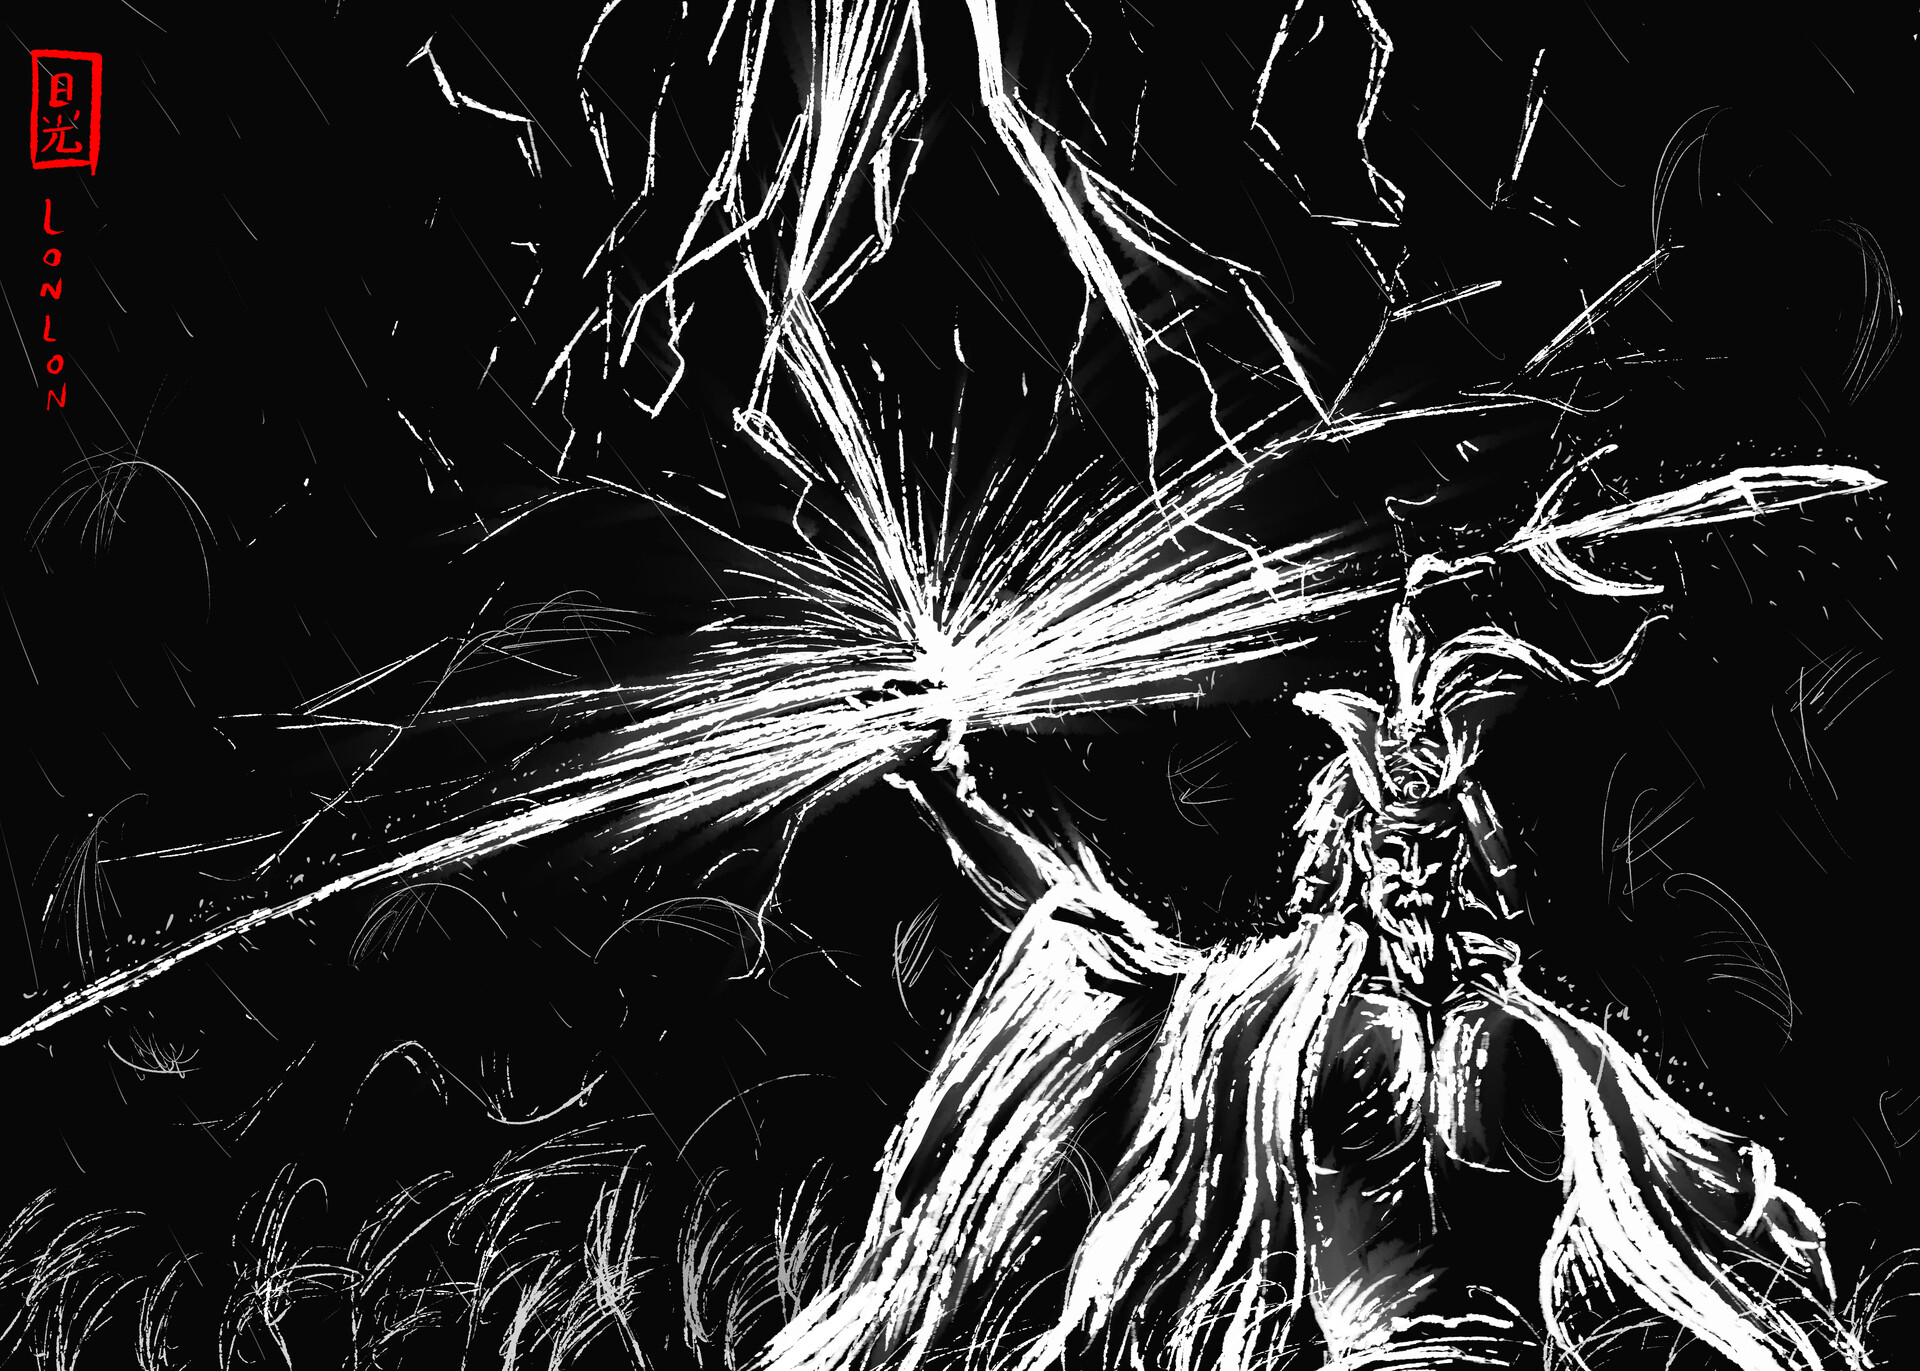
Day 3 - Sword Saint Isshin and the lightning of Tomoe technique. Started with a black canvas drawing with white on it.

Day 4 - Racket Boy & Girl - Sky Racket

Day 5 - Mega Foxorah - Sky Racket

Mega Foxorah process 1 - started sketching from the head that's covered by the other heads

Mega Foxorah process 2 - Colored using neutral colors -> shadows -> highlights (not in the pic.) After that, it's shading time!

Day 6 - "Mantis Dragoon" - Hollow knight - (it's a Mantis Lord with a Final Fantasy dragoon pose)

"Mantis Dragoon" process 1 - Sketching and line art

"Mantis Dragoon" process 2 - After lines are done, it's time to add shadows for the shading! Final touches and presto!

Day 7 - Troupe Master Grimm - Hollow knight

Troupe Master Grimm process - Starting with a dark background, I sketch the character while thinking about how it'll blend with the background later. Basic colors then shading with some details to finish it.

Day 8 - Cornifer and Iselda... little knight too. - Hollow Knight

So, I've not practiced a lot with composition and scenery, but I challenged myself here. After sketching I started with the characters first.

Due to time, some details were left out, I approached the scenery the same way I'd approach any drawing of similar style. Neutral > shadow > highlight > shading. It's not amazing but for my skills, it's a huge win!

Day 9 - Hornet - Hollow Knight

Hornet process. Sketch and colors shading first.

And then messy ink fun \o/ oh! right, and a simple background.

Day 10 - Wrastor - Rivals of Aether

Wrast--wait, what? Yeah, originally I intended to do another character (Absa) but the sketches were not ringing for me, so I swapped to Wrastor.

Wrastor process 1 - After trying some poses, I went with a simple one that still has his personality in it.

Wrastor process 2 - time for colors. After the shadows were done, I added highlights and the rim light as a call back to the fighter illustrations from the game

Day 11 - Clairen - Rivals of Aether

Clairen process 1 - I went with a similar idea from the official illustration for this character... But then I had a cool idea!

Clairen process 2 - I divided each of the colors into different layers and not forgetting that all light is coming from the fire saber

Day 12 - Kragg - Rivals of Aether

Kragg process 1 - A little change in his hand and it's good to go!

Kragg process 2

Day 13 - Orcane - Rivals of Aether

Orcane process 1 - I wanted him to morph out of the water, so I only did half of the line art to give different weight to it. I'm ignoring that now I think the eye on the sketch is cooler. IT'S IN THE PAST NOW.

Orcane process 2 - I gave him lots of different highlights and started making the morphing. To give a very "water" feeling I've colored his outline art in tones of blue.

Day 14 - Cube Kirby?! - Kirby Series/Super Smash Bros. Ultimate. Steve had just been released on that day, it felt very appropriate. I mean... look at him XD

Cube Kirby process 1 - After sketching Mr. Cube here, I filled the parts of his blocky body shading accordingly. Yes, I had a Photoshop handicap for some straight lines. ...what?

Cube Kirby process 2 - After shading, I added an outline just to make it pop

Day 15 - Meta knight - Kirby Series

Meta knight process 1

Meta Knight process 2 - Added a stroke-like design behind him to add movement

Day 16 - King Dedede- Kirby Series. I tried to do this one without any kind of line art.

King Dedede process 1 - Well... Yeah... I'm missing the litter sketch. I've used symmetry to get the litter right.

King Dedede process 2 - Changed the hammer to a better position.

King Dedede process 3 - The background is two different layers that are on top of each other, with the art one opaque.

Day 17 - Mimikyu - Pokémon

Mimikyu process 1

Mimikyu process 2 - After finishing all the coloring, I painted only the line art for that effect.

Day 18 - Magikarp - Pokémon

Magikarp process 1

Magikarp process 2 - I've done the ripples on different layers. The props on the water are not fully colored because the splash will cover it.

Day 19 - Ho-oh - Pokémon

Ho-oh sketch.

Days 20-21 - Luigi, Gooigi, Polterpup, and King Boo - Luigi's mansion series. This was a collab with a friend who didn't want to be credited. I insisted to sign his nickname at least. He did the sketch.

Days 20-21 process 1 - Sorry for the mistake on image order. Please follow the arrows

Days 20-21 process 2

Day 22 - Adoroboros - Temtem

Adoroboros process 1 - Again, tried to not use any line art. I tried to mimic the cell-shaded visual Temtem has.

Day 23 - Saku - Temtem. Same approach as the previous day.

Day 24 - Dragonslayer Ornstein - Dark Souls. This drawing was special. I've redrawn a old drawing using the same reference and all

The original drawing on the left. Sketch on the right

Day 25 - Gwyn, Lord of Cinder - Dark Souls

Gwyn process 1 - you get to see that i have a long way to drawing humans on the sketch.

Gwyn process 2 - After the shading process, some final touches and embers.

Day 26 - Master Xehanort - Kingdom Hearts. I drew it on top of the sketch, woops.

Day 27 - Ruby Weapon - Final fantasy XIV

Ruby Weapon process - After sketching, I traced it again adding more details with the "pencil" brush, but my original idea for that didn't worked.

...so I had to trace it yet again, and this time, do something I was familiar with

Day 28 - Ravana "Atma Linga" - Final Fantasy XIV

I wanted something more minimalistic that could fit the gradient-like effect Final Fantasy illustrations have.

Days 29/30 - Bahamut Prime - Final Fantasy XIV

Bahamut process 1 - This was a big boy. Started with a rough sketch of what I wanted before deciding the actual pose. I've used symmetry for the shape of the body and wings.

With the line art done, I made it a bit thicker to start coloring. If you noticed Image 7 has a piece of armor that was missing before, you're not crazy, I forgot it lol.

Time for the background. I wanted a similar environment from the FFXIV cutscene. So I tried to do far away clouds catching light from the fire and destruction bellow. Embers to emphasize it.

Added color to his outline, alongside the armor and wings glow to help give the impression that he's surrounded by an aura of power, like his ultimate form from the game.

Day 31 - Friends! - Final Fantasy XIV - Inspired by one of my biggest inspirations, Yoshitaka Amano.

I've used a little (big) help from posing software for the composition and the actual drawing too. My skills are still very limited on this to not use help.

I traced and stylized each character on a different layer. When all characters were done, I filled them with white on a layer bellow the lineart

Experimented with outline and glow effects until I got to the desired result. I copied everything and blured it on a layer below.

Ending - "owari" - Amaterasu from Ōkami

Amaterasu process 1 - Already had the big brush stroke positioned right from the start, so I could place the character well on the scene

After finishing the colors, added some grass, petals and last but not least, a scroll texture to it.